

Residents initially received mixed messages about wearing face coverings in public, but health officials now agree they may reduce the risk of spreading COVID-19, particularly when the state starts loosening stay-at-home restrictions in the future.
“Face coverings are likely to become common in public,” said Dr. Sonia Angell, director of the California Department of Public Health, in a briefing Tuesday. “Some areas are using them and have had much stronger recommendations about using them, but as we spend more time in the public, it becomes even more important that we use all of the different interventions that we have as added value.”
The California Department of Public Health says face coverings can help reduce transmission from asymptomatic COVID-19-positive people. The Centers for Disease Control and Prevention encourages using face masks in public, especially in places where social distancing measures of staying 6 feet apart are difficult to maintain.
Still, Santa Clara County Health Officer Dr. Sara Cody has emphasized face coverings are not a substitute for hand washing, physical distancing or staying home when sick. And the most important step residents can take, she added on Wednesday, is limiting contact with people outside of their household.
Surgical and N95 masks should be reserved for medical professionals and first responders. While there has been a national shortage of personal protective equipment, Gov. Gavin Newsom said California has forged supply partnerships to get 200 million masks monthly. The county, though, has asked businesses and residents with large stockpiles of PPE to report their inventories by Wednesday in case of local shortages.
For residents, cloth face coverings with multiple layers should do when out in public for essential activities, officials say. Inserting a coffee filter or paper towel between layers can also help prevent particles from coming in or out.
Here’s how to wear a face covering and make your own using household items, per the CDC:
Wearing face coverings
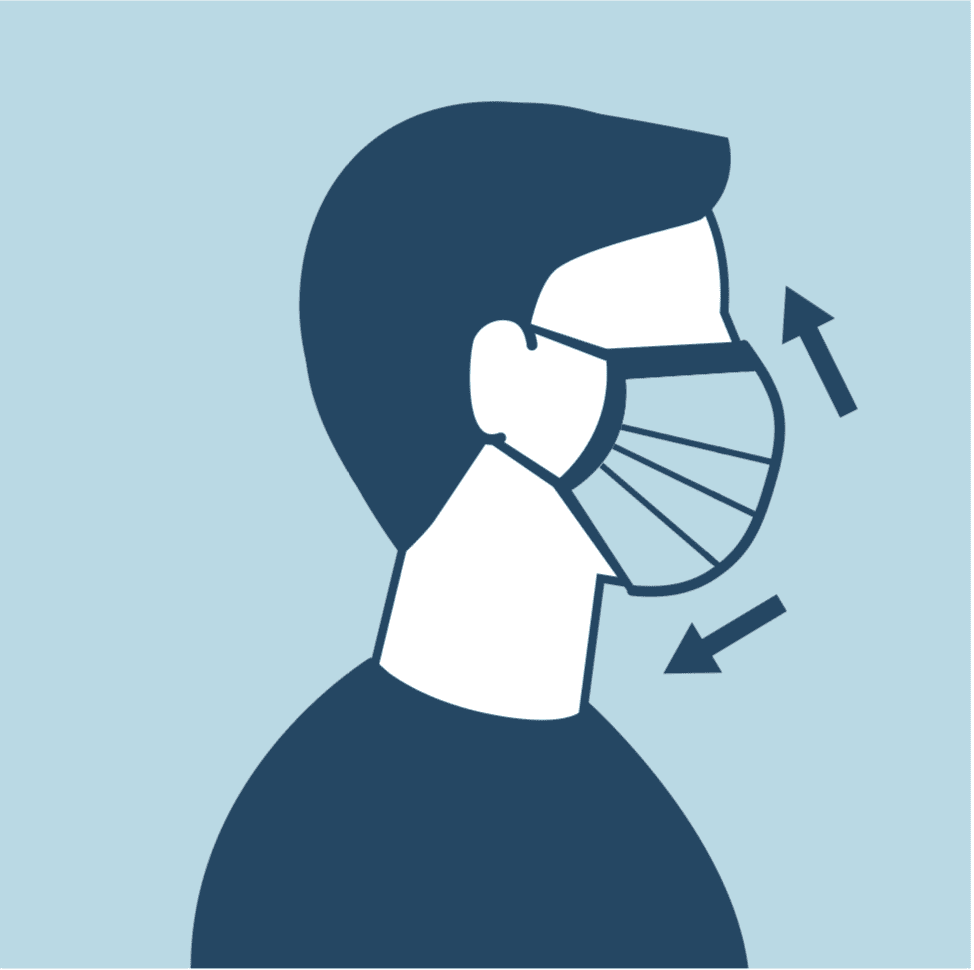
Face coverings should fit snugly but comfortably against the side of your face, going up to the bridge of your nose and down past your chin. Lowering the covering from your nose and mouth while talking defeats the purpose of wearing it, since you can spread the virus while talking, health officials say.
To remove your face covering, grab it by the strings or ties and take it off, not by the cloth. Don’t touch your eyes, nose and mouth after removing it. Wash your hands immediately.
Store your mask in a bag or bin until it can be washed, which. ideally, is daily. Cloth face coverings can be cleaned in a washing machine.
The CDC says children under 2, people with trouble breathing or those who can’t remove the mask without assistance should not wear one.
Bandana face covering
Materials
- Bandana or square cotton cloth
- Rubber bands or hair ties
Steps
- Fold material in half.
- Fold top down and the bottom up to create layers.
- From sides of the cloth, place rubber bands or hair ties about 6 inches apart.
- Fold the sides to the middle.
To wear, place bands around your ears. See Surgeon General Dr. Jerome Adams’ video below.
#DYK? @CDCgov's recommendation on wearing a cloth face covering may help protect the most vulnerable from #COVID19.
Here's how you can make one today, in just a few easy steps: pic.twitter.com/eFuE7Brw0J
— U.S. Surgeon General (@Surgeon_General) April 4, 2020
T-shirt face covering
Materials
- T-shirt
- Scissors
Steps

- Cut across bottom of shirt 7 to 8 inches with scissors.
- Cut out 6 to 7 inches lengthwise from one side, leaving material above and below.
- Cut the edges of the remaining material above and below the newly cut-out fabric. These are tie strings for the mask.
Tie strings around neck first, then over top of head.
Sewn face covering
Materials
- Two 10-by-6-inch rectangles of cloth fabric (tightly woven cotton, like quilting fabric, tee, or cotton sheets)
- Two pieces of elastic, 6 inches long by an eighth inch wide (rubber bands, string, cloth strips, or hair ties suffice)
- Needle and thread, or bobby pin
- Scissors
- Sewing machine
Steps
- Stack the two cloth rectangles so it looks like a single fabric.
- Fold long sides a quarter inch and hem. Fold short sides a half inch and stitch down.
- Create the ear loops: Run each elastic piece through the wider, half-inch hem on each side of the mask. Use a large needle or bobby pin to thread it through for each side. Tie the ends tight. (If you only have string, make the ties longer to tie the mask around your head.)
- Gently pull the elastic so the knots are tucked inside the hem. Adjust so the mask fits your face. Stitch elastic in place at the corners of the cloth to keep them from slipping.

Senior Reporter Janice Bitters contributed to this story.
Contact Eduardo Cuevas at [email protected] or follow @eduardomcuevas on Twitter.
Editor’s Note: In a new series focused on bringing you “news you can use” during the crisis, we provide tips and explanatory stories to help you survive the COVID-19 pandemic. What do you want to know? Let us know: [email protected].
Catch up on our first story: How to apply for unemployment benefits in California
Leave a Reply
You must be logged in to post a comment.